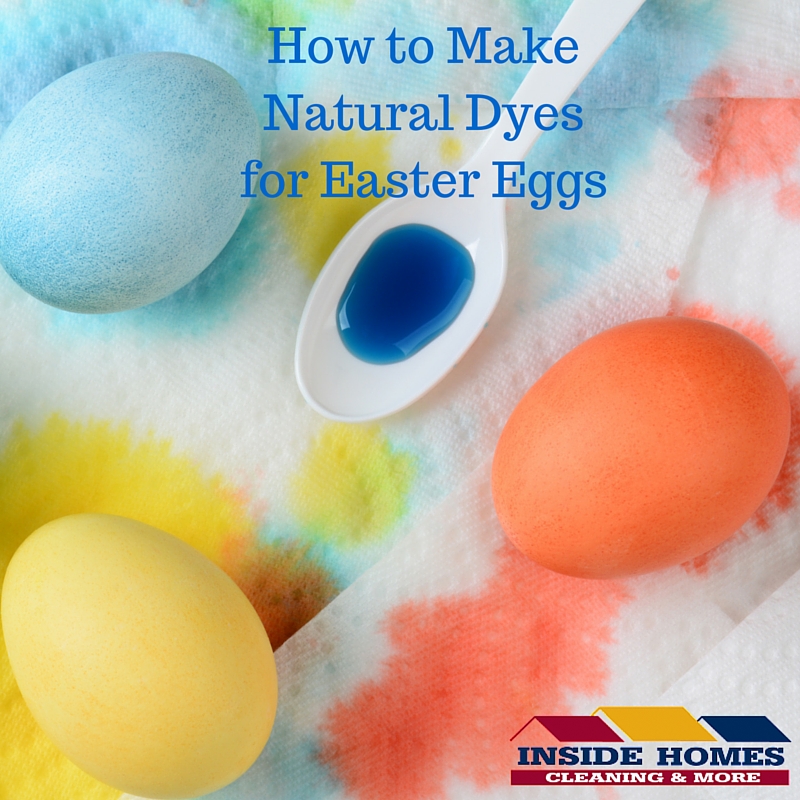
Easter is a time for celebration with your family and friends and marks the beginning of Spring. Easter means candy, baskets, bunnies, and dyeing Easter eggs. Easter egg dyes cause stains and I don’t know about you, but we always make a mess and somehow manage to dye something we didn’t intend to. Inside Homes Cleaning and More is here to walk you through making natural Easter egg dye to help avoid dyeing mishaps and to make cleaning up a whole lot easier.
You want to start with eggs that have been sitting in your refrigerator for at least three days to five days. The fresher the eggs, the harder they will be to peel because the white membrane isn’t mature enough. Once you have boiled them, let them cool completely in the refrigerator before attempting to dye them. Once they have cooled, wash them in warm soapy water to remove and oily residue since this might stop the color from adhering to the egg. You can draw shapes, pictures, or designs and even use rubber bands on the eggs with crayon or a piece of wax before you start the dyeing process. The wax doesn’t absorb any of the dye to the designs will show through.
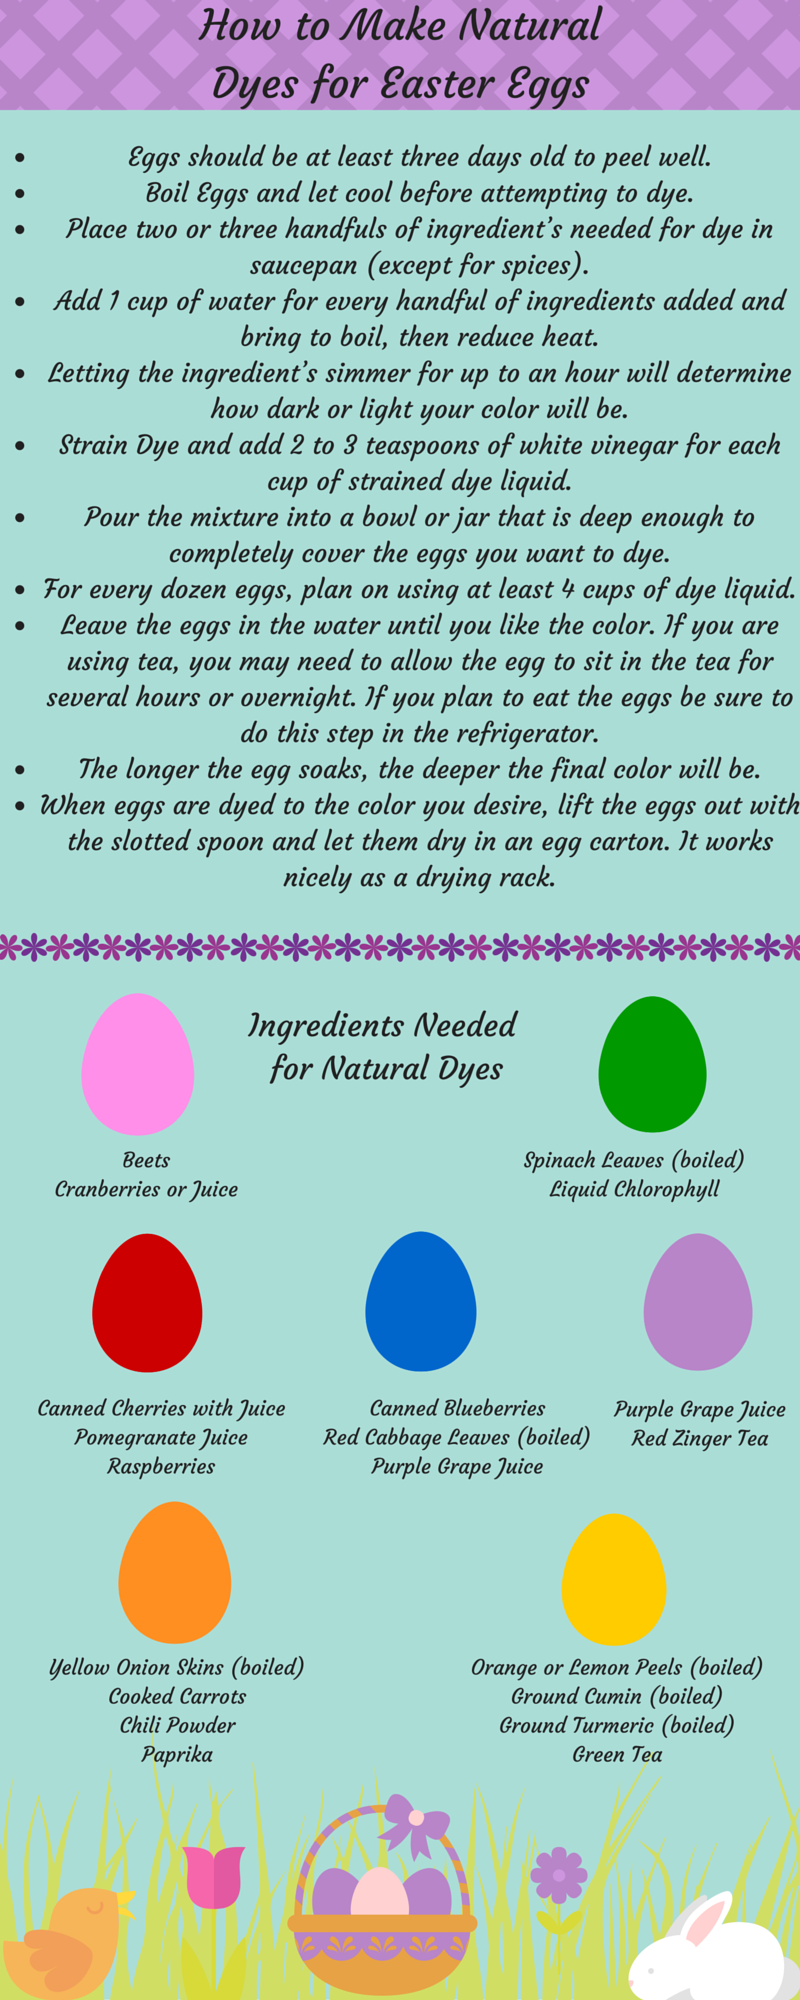
Making natural Easter egg dyes requires a lot of patience, but the end result will leave you with something to be proud of. When measuring out the ingredients needed to make each dye, you need to use your own judgement. You should place two to three handfuls of ingredients in a saucepan, except if you are using spices. Spices will have to be measured solely off of your judgement. Add enough tap water to come at least one inch about dye ingredients. After making these, we can tell you will need about 4 cups of dye to one dozen eggs if that helps out with your measurements.
Bring everything to a boil and then reduce the heat to low. Let simmer about 20 minutes to an hour until the dye has turned to the color you would like. The darker the dye, the more vibrant the color, but keep in mind your egg will not turn out as bright as the dye itself. Remove the pan from heat and strain out leftover ingredients. All that should be left is your dye liquid. Add about 2 to 3 teaspoons of white vinegar for each cup of strained dye.
Pour the dye mixture into a bowl or jar that is deep enough to completely cover the eggs you want to dye. If the liquid is still hot, please use a slotted spoon to lower your eggs into the dye. Leave the eggs in the dye until you achieve the color you are looking for. If you are using tea to dye your eggs, you will need to let the eggs sit overnight somewhere like your refrigerator to achieve a deeper color.
When the eggs are dyed to the color you want, lift the eggs out with the slotted spoon. Be careful to handle your eggs gently so that some of the color doesn’t rub off. Let them dry in your leftover egg carton or on a rack or drainer. We prefer the egg carton because it works nicely as a drying rack and it should be readily available if you didn’t throw it out. You can achieve a textured look by dabbing the egg with a sponge while it’s still wet. If you want a glossier finish, you can rub the eggs with cooking oil or mineral oil to give them a soft sheen.
You can lay out newspaper or paper towels wherever the dyeing process will take place to ensure the clean-up process is easier. Making natural dyes not only creates a memorable experience for you and your family, it’s also better for your things so you don’t accidentally ruin them with Easter egg dye. We don’t know how many times one of our counter tops got permanently stained by a rogue egg spill. We would like to wish you and your family and Happy Easter this year.


Leave A Comment